
Hi! Welcome to Feedvisor!
You've just recently joined Feedvisor and you are eager to start harnessing the power of Feedvisor's features to your online storefront.
To help you utilize the platform to its maximum potential, we offer several onboarding sessions which provide guidance on how to set up your account along with a review of Feedvisor's features and capabilities.
Please review and complete the following first steps listed below before our first call.
Our customer success group professionals will reach out to you to help you get started, however, here are a few actions you can take on, to get more familiarized with the Feedvisor platform.
Execute the following steps to complete the process:
Feedvisor uses your set Item Cost to calculate your profit, among other elements, so in order to start setting cost structures and price ranges, you'll need to insert the cost of your inventory.
Once your account is populated with your storefront inventory, you are able to export a file which in turn will allow you to insert the cost of your SKUs.
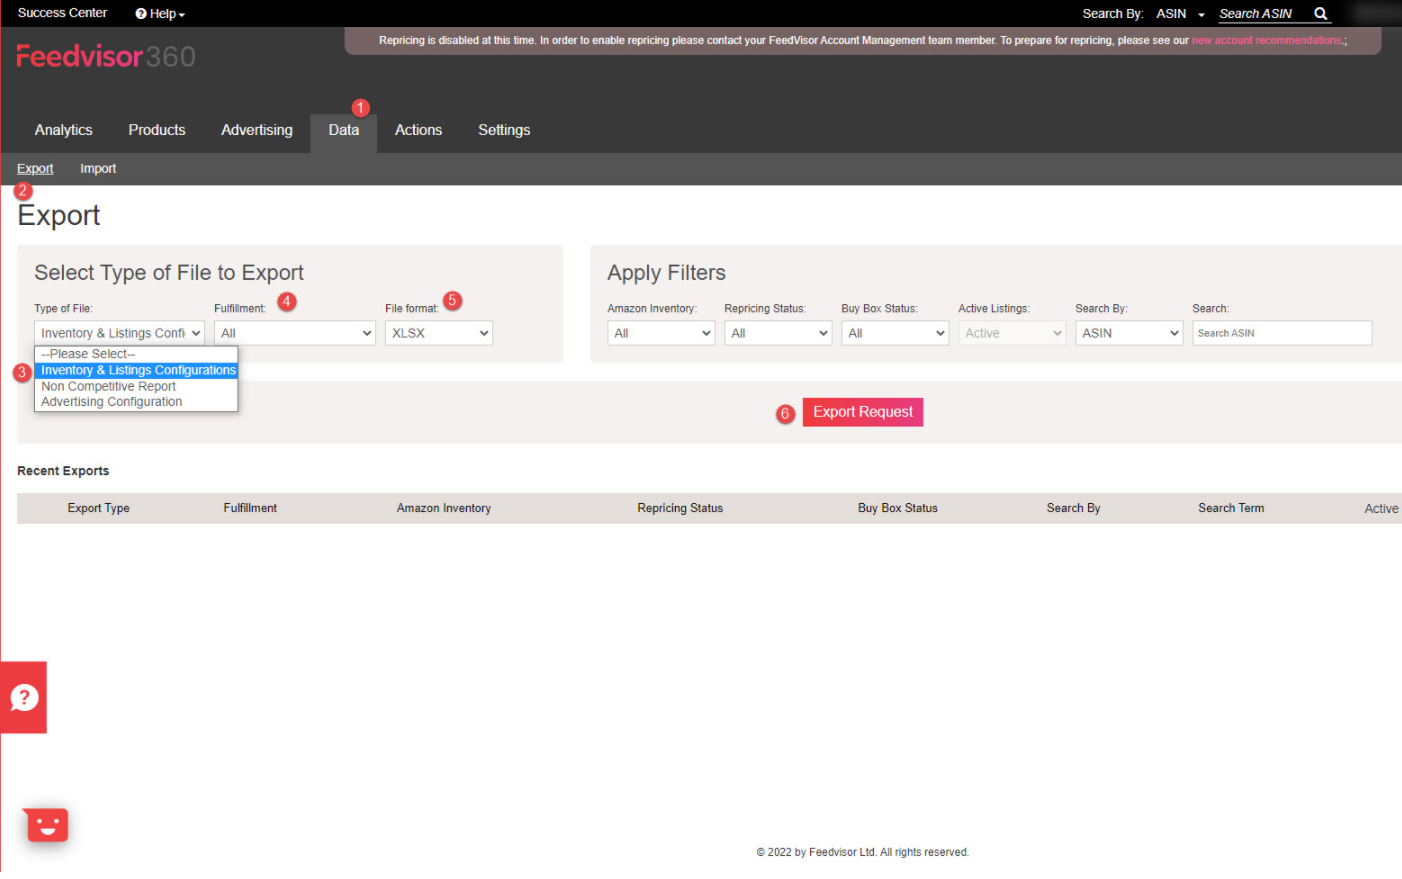
- Click on the Data Tab
- Click on the Export sub-tab
- Select Inventory & Listings configuration under Type of File
- Select All under Fulfillment
- Select the file Format
- Click Export Request
- Download the file, and open it in Excel. In the Inventory Sheet, update your costs in column D as seen below
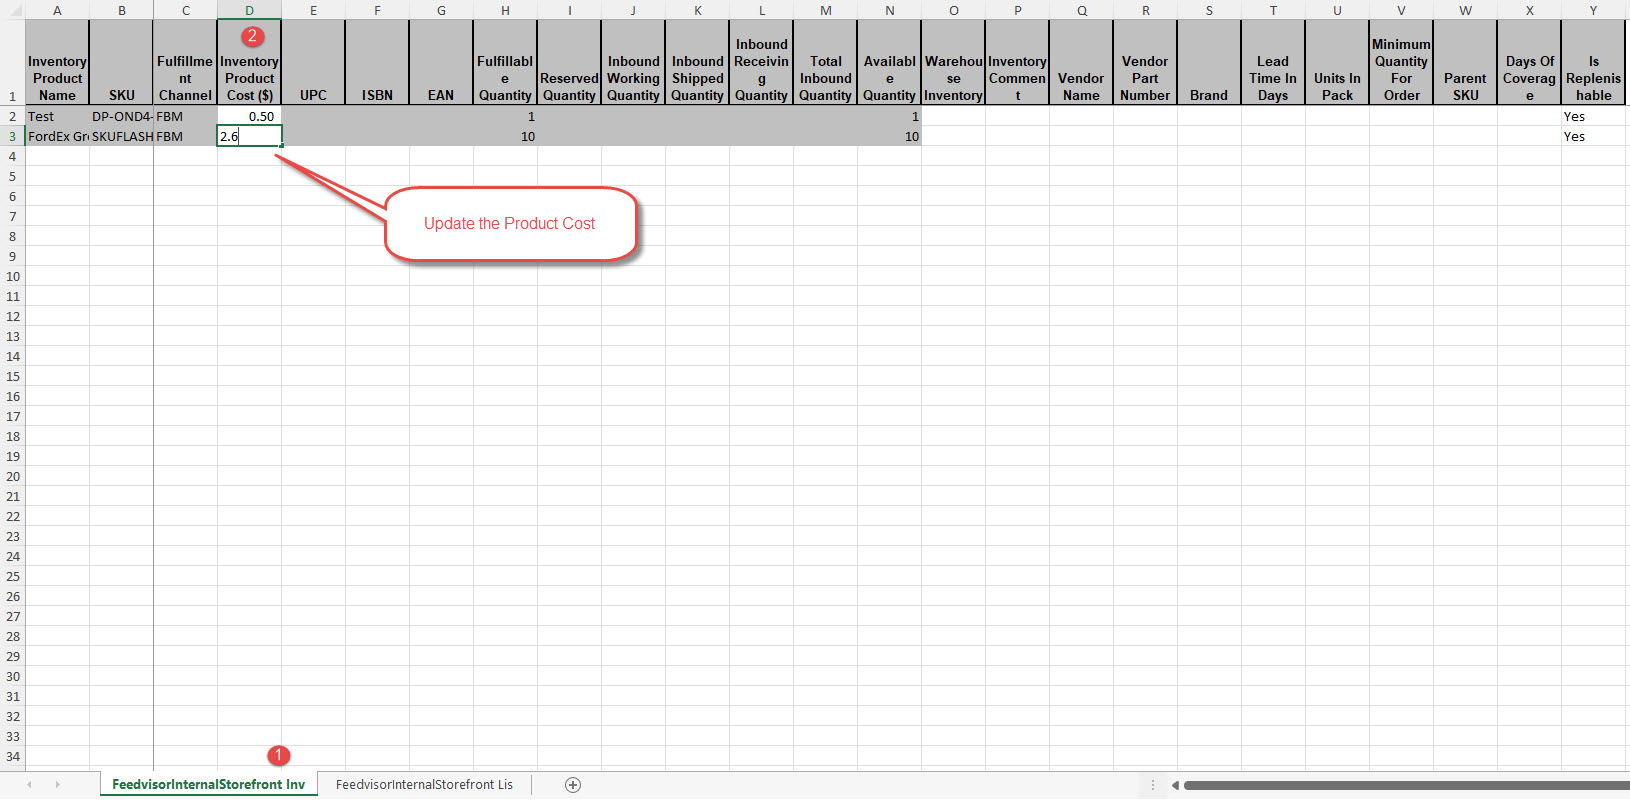
- Save the changes to your file
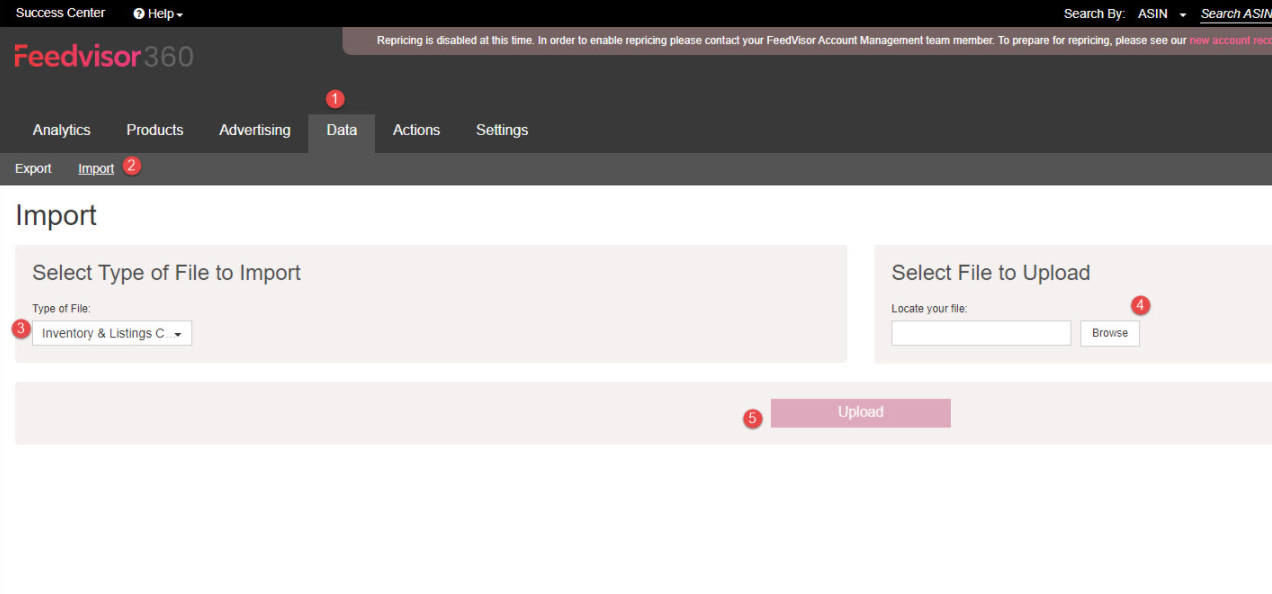
- Click on the Import sub Tab
- Select Inventory & Listings configuration under Type of File
- Click Browse and locate your file.
- Click Upload
That’s it! You've updated your inventory costs. Your success manager will help guide you through the processing of setting a relevant markup for your items and setting up the general cost structure.
Add your International or Multi-channel storefronts
If you're selling on Amazon.com, chances are you might be selling your products on additional Amazon marketplaces, such as Amazon.ca or the European marketplaces (Amazon.de / .co.uk / .fr / .it / .es)
If you have Walmart, eBay, Shopify or BigCommerce storefront, you may want to add and link them to Feedvisor as well.
Click here to learn how to add a new storefront
Once created, we will start to collect data from this storefront, a process that usually takes 24 hours.
We offer our valued customers an extensive, dynamic Success Center that is here to answer all your questions regarding Feedvisor, Amazon, and anything in between. You are welcome to visit at https://dashboard.feedvisor.com/success-center
Additionally, we offer free access to our great Resource Center, which packs an awesome punch in delivering great knowledge, tips and tricks from our Amazon Experts, including Webinars, Strategy guides and articles, and much more!
If you are managing multiple storefronts in Feedvisor, you can set the default storefront which loads when logging into Feedvisor Dashboard and set a default currency for all the storefront (default in USD)
Additionally, you can set a default language for a storefront or for all storefront (Feedvisor's dashboard supports English, German and French)
To set defaults:
- Change to Portfolio view in the right drop-down menu
- Click on your username (Upper right box in the Dashboard)
- Click on User Details
- Choose the desired Language / Currency.
- Click on the Update button

Check your Amazon Minimum and Maximum Prices
If you're selling on Amazon, chances are you are familiar with the concept of Minimum and Maximum price boundaries on Amazon.
These boundaries are a safety measure to ensure that your items will not be priced below or above a specific range.
You'll have to set your Minimum and Maximum range for your items via the Inventory Loader in Seller Central, to ensure that your items don't go inactive due to a potential pricing error; if your Feedvisor price range exceeds the min-max range in Amazon, Feedvisor's price feeds may cause your item to de-activate.
Please note that if you do not set your min and max range on Amazon, Amazon may set it for you.
Happy Selling!
Comments
0 comments
Please sign in to leave a comment.